
The Groups section is used to manage user groups and group memberships within the Aware Intel Hub.
Groups provide a way to organize users and assign access more efficiently. Instead of assigning roles directly to each individual user, administrators can assign roles to a group and then add users to that group. This creates a cleaner and more consistent permission structure because access can be managed at the group level.
This section is primarily intended for system administrators or users with group management permissions. Access to this section and available actions depend on user role, permissions, and agency configuration.
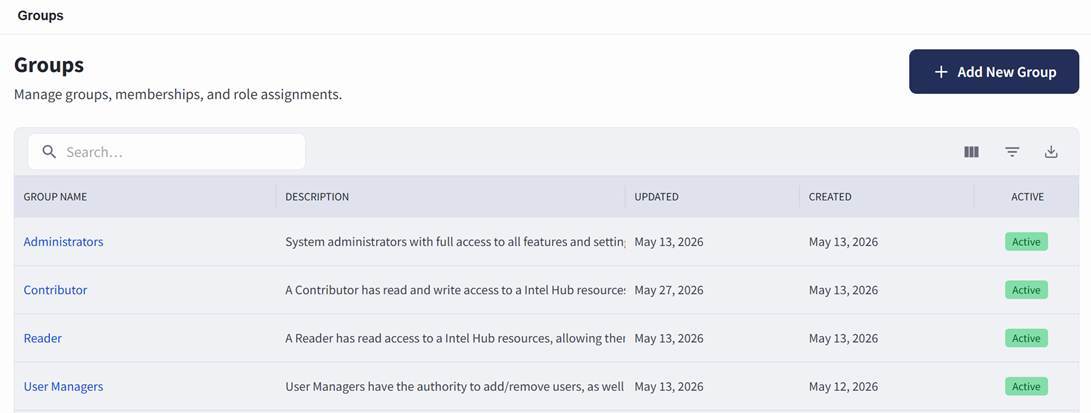
The Groups screen can be accessed by selecting Settings, then choosing Groups under Access Management.
The Groups screen displays existing groups in a table.
Searching for Groups
To search for a group:
- Open the Groups section.
- Use the search bar on the Groups screen.
- Enter the group name or other available search information.
- Review the filtered results in the groups table.
- Select the group name to review additional details.
Creating a Group
Users with the appropriate permissions can create a new group from the Groups screen.
To create a group:
- Open the Groups section.
- Select + Add New Group from the top right.
- Enter the Group Name. This field is required.
- Enter a Description. Although the Description field is not required, it is recommended. A clear description helps administrators understand the purpose of the group and makes group management easier over time.
- Select Create Group.
Group Details Screen
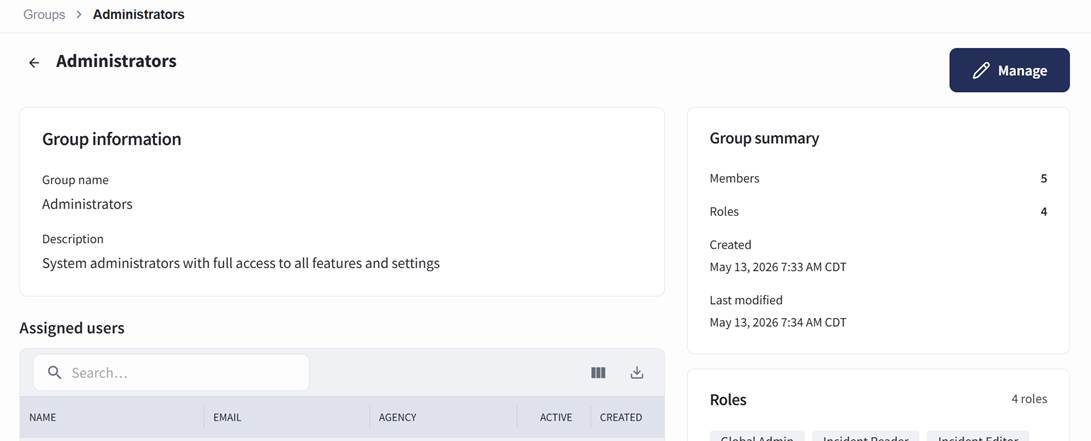
Opening an existing group takes you to the Group Details Screen.
To open an existing group:
- Open the Groups section.
- Locate the group in the Groups table.
- Select the group name.
The Group Details Screen displays information associated with the selected group.
The Group Details Screen includes:
- Group Information, including the group name and description
- Group Summary, including the number of members, number of assigned roles, created date, and last modified date
- Assigned roles
- Assigned users
Editing Group Details
Users with the appropriate permissions can edit the group name and description from the Group Details Screen.
To edit group details:
- Open the Groups section.
- Select the group you want to update.
- Select Manage in the top-right corner.
- Update the group name or description.
- Select Save Details to save the changes.
If you need to discard the changes before saving, select Reset. The Reset option restores the group name and description to their previous values.
Adding Members to a Group
Users with the appropriate permissions can add members to a group from the Group Details Screen.
To add members to a group:
- Open the Groups section.
- Select the group you want to update.
- Select Manage in the top-right corner.
- Locate the assigned users table.
- Select + Add Members above the assigned users table.
- Select the users that should be added to the group.
- Save or confirm the member selection.
Adding members to a group gives those users the access associated with the group’s assigned roles.
Assigning Roles to a Group
Users with the appropriate permissions can assign roles to a group from the Group Details Screen.
To assign roles to a group:
- Open the Groups section.
- Select the group you want to update.
- Select Manage in the top-right corner.
- Locate the roles box.
- Select the roles box.
- Place a check mark next to each role that should be assigned to the group.
- Select Update Roles.
Roles assigned to a group apply to the users who are members of that group. This is the preferred way to manage permissions because it allows administrators to update access for multiple users by managing the group instead of assigning roles user by user.
Deleting a Group
Users with the appropriate permissions can delete a group from the Group Details Screen.
To delete a group:
- Open the Groups section.
- Select the group you want to delete.
- Select Manage in the top-right corner.
- Select Delete Group.
- Confirm the deletion when prompted.